Posts

Showing posts from December, 2009

home-made vents for latex cement skirting

Image
Last summer I took a week off work in hopes of completing a few projects, one of which was to build the section of latex cement skirting that would run right along the front walk. As it turned out, it was a terrible week, and the finished skirting, which involved some experimenting, was a big disappointment. For one thing, I used fewer of the pvc studs described in an earlier post (http://papercreteparadise.blogspot.com/2009/05/latex-cement-skirting-for-mobile-home.html ), so the nylon flyscreen was even more prone to stretching and sagging under the weight of the first coat of latex cement. Secondly, I ran out of the little washerless screws I'd been using to attach the flyscreen to the studs, and substituted sheetrock screws I had laying about. I used small pieces of cardboard as washers. This was certainly less expensive, but my little cardboard washers are visible under the latex cement. Third, and most important, I attached vents I'd made from papercrete, which looked ter
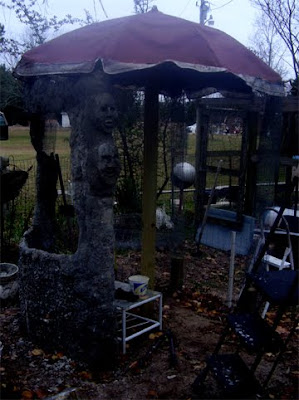
Gazebo 5

Image
I finally had the opportunity to work on the gazebo. Inclement weather, early sundowns, and other projects always seem to get the way of adding more papercrete to the structure. The other projects include renovating a 40 year old mobile home (I'm replacing the windows first (two down, ten to go), building a papercrete "sprayer" for use with an air compressor, and, of course, working on polymer sculptures. I'm hoping to post photographs of the mobile home (and new sculptures) as we progress. The trailer has been on our property awhile, and we were going to give it to the in laws to use for storage. But the county will not give us a permit to move a mobile home build prior to 1985 unless it's going to the land fill. Nor will they give a contractor a permit to rewire the thing. We felt it was just too valuable a space to pay someone to haul it to the dump, so we're taking it "off grid" and turning it into a studio. I'm hoping to cover the entire be

Gazebo 4

Image
I've been adding more papercrete to the fence/hardware cloth/chickenwire armature, using small, hand-mixed batches of the sculptue mix, which is cellulose insulation, Portland cement, and joint compound, with no sand. Once this dries I think the armature will be more substantial, and additional layers may be of the "construction" mix using the tow mixer, which will probably go faster. The poles at the entrance will be totems. Since they are upright (and I'll be working "against gravity") I'm going to try fastening the faces to the crete-covered poles with masonry glue and wood screws, and papercreting around them.

Umbrella-gazebo structure 3

Image
The wire armature for the gazebo is almost complete. I couldn't wait, and started daubing papercrete on. I'm interested to see if the armature will be sturdy enough. My pre-soaked cellulose papercrete formula wasn't working out. There was just too much slump. The crete would not stick to the upright armature. So, instead of my usual sculpture mix, I mixed three 2-pound coffee cans of dry cellulose insulation and one can of Portland cement, then added water until it was a damp, thick paste. Then, instead of the powdered joint compound I've been sold on, I added (a big gob) of premixed joint compound. The result, when well mixed by (rubber-gloved) hand, was truly clay-like and stuck well to the chicken wire and hardware cloth. Hope to work more on it tomorrow.