trash paper gazebo 6

Friday I replaced another window in our vintage mobile home, then replaced a headlight in our '98 New Beetle. Both were merciless chores that ate the day away. It's no wonder they charge so much to replace a headlight at the dealership.
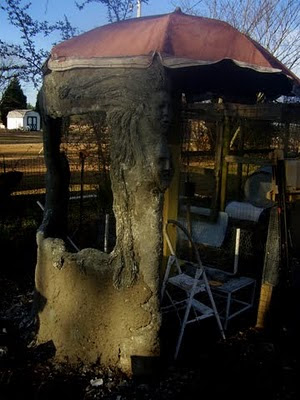
I worked the weekend, then on Monday finally had an opportunity to put some time on the gazebo. It was 60 beautiful degrees out there. I mixed two batches of papercrete using the tow mixer, making a tiny dent in the mountain of trash paper I've collected lately, and added layers to the inside and outside of this first section of the gazebo. I wanted to work one section as opposed to giving the entire structure a coat to be sure the fence, chicken wire, and hardware cloth armature is sturdy enough to support the papercrete.
This fence wire--a generous gift from a neighbor--is incredibly flimsy, and even with a couple layers of it the armature was somewhat flexible. I sturdied the bottom wall using pvc pipe for studs (no rebar handy) but, despite a few ideas, couldn't work anything out for the top portion. I had a sense that if I got one layer of papercrete to stick it would give me a sturdy foundation on which to add more layers, and this turned out to be the case. This secition of wall is probably 3 and 4 inches thick now, and is very sturdy.
I added ready mix joint compound to some of the mix to make it stickier and used it to form the hair design facade, and to make a couple more faces for the totem at the entrance.


Comments
Post a Comment